
Android Studioで開発したFlutterアプリをiOSまたはAndroidシミュレーターでで起動させる方法を紹介します。
Flutterの環境構築がまだ済んでいない方はこちらの記事を参考にしてみてください。

iOSシミュレーターを起動させる
iOSシミュレーターを起動させる方法をいくつか紹介していきます。
方法1:ターミナルから起動させる
ターミナルを開き次のコマンドを実行するとiOSシミュレーターを起動できます。
$ open -a Simulator方法2:Android Studioで起動させる
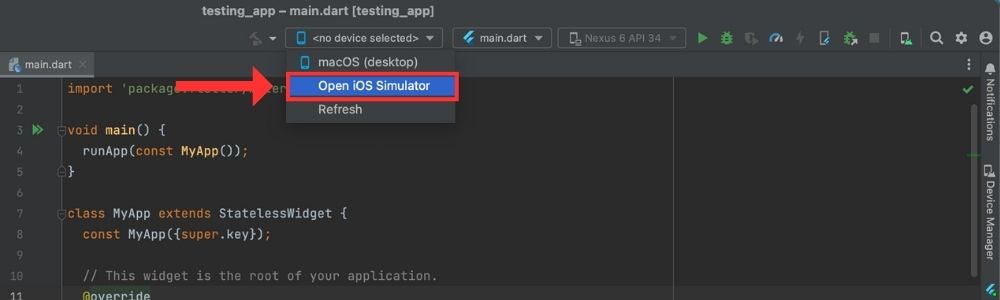
Android Studioを開き画面中央上にある「Flutter Device Selection」から「Open iOS Simulator」を選択することでiOSシミュレーターを起動できます。
方法3:Xcodeで起動させる
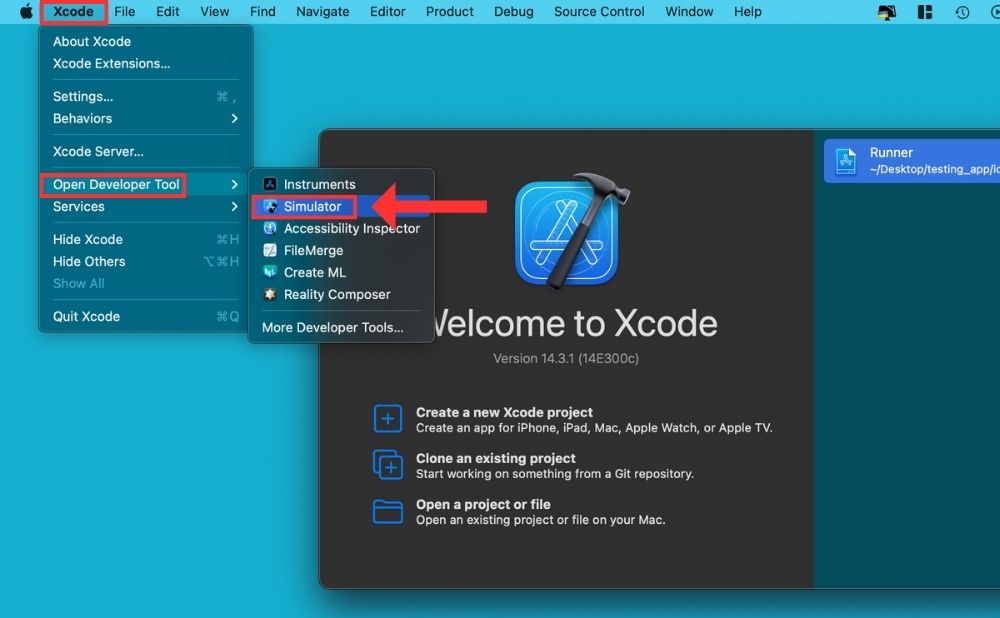
Xcodeを開き「Xcode」>「Open Developer Tool」>「Simulator」からiOSシミュレーターを起動できます。
FlutterアプリをiOSシミュレーターで起動させる
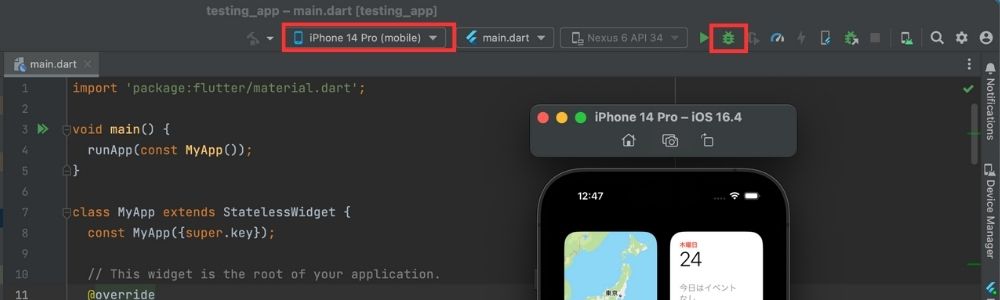
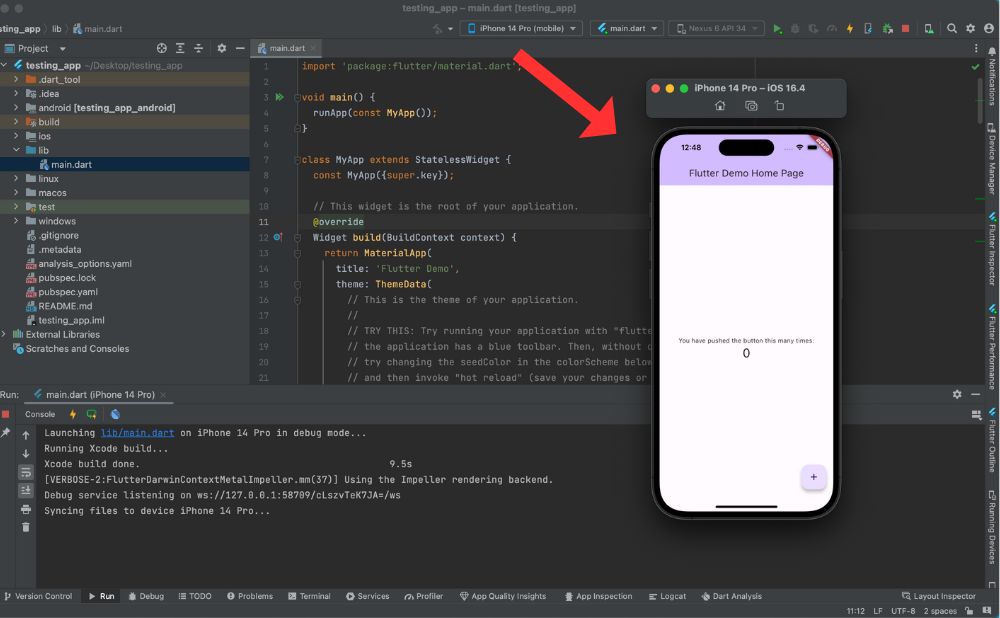
FlutterアプリをiOSシミュレーターで起動させるには予めiOSシミュレーターを起動させておき、画面中央上にある「Flutter Device Selection」から起動させたiOSシミュレーターを選択します。
次にデバッグボタンをクリックすればFlutterアプリがiOSシミュレーターで実行されます。
Androidエミュレーターのセットアップ
Android Studioで初めてAndroidエミュレーターを起動する方はまず初めにAndroidエミュレーターのセットアップをする必要があります。
既にセットアップが完了している方は読み飛ばして大丈夫です。
Flutterプロジェクトを作成
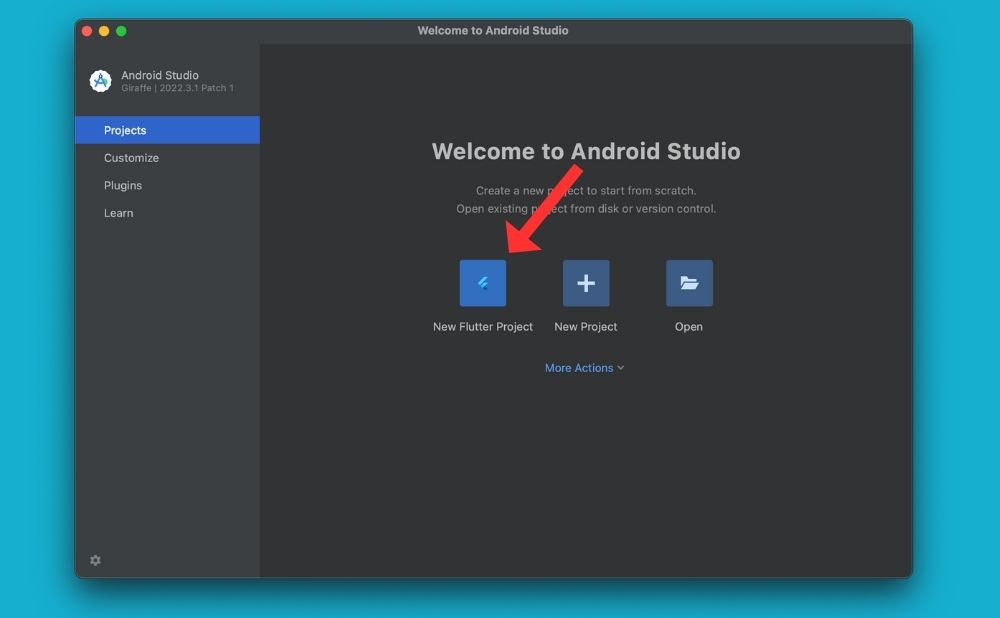
Android Studioの「New Flutter Project」からFlutterプロジェクトを作成します。
Androidエミュレーターの作成
Android StudioでFlutterプロジェクトを開き、画面右上にある「Device Manager」を選択し「Create Device」をクリック。

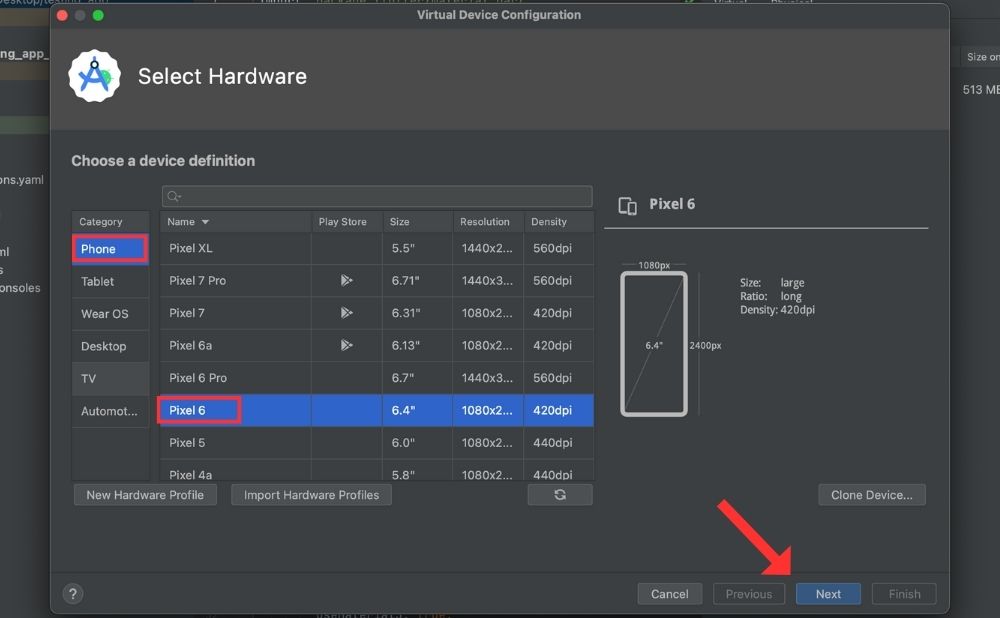
「Select Hardware」でFlutterアプリを起動させる際に使用するデバイス(Androidエミュレーター)を選択し「Next」をクリック。
今回は「Pixel 6」を使用して紹介していきます。
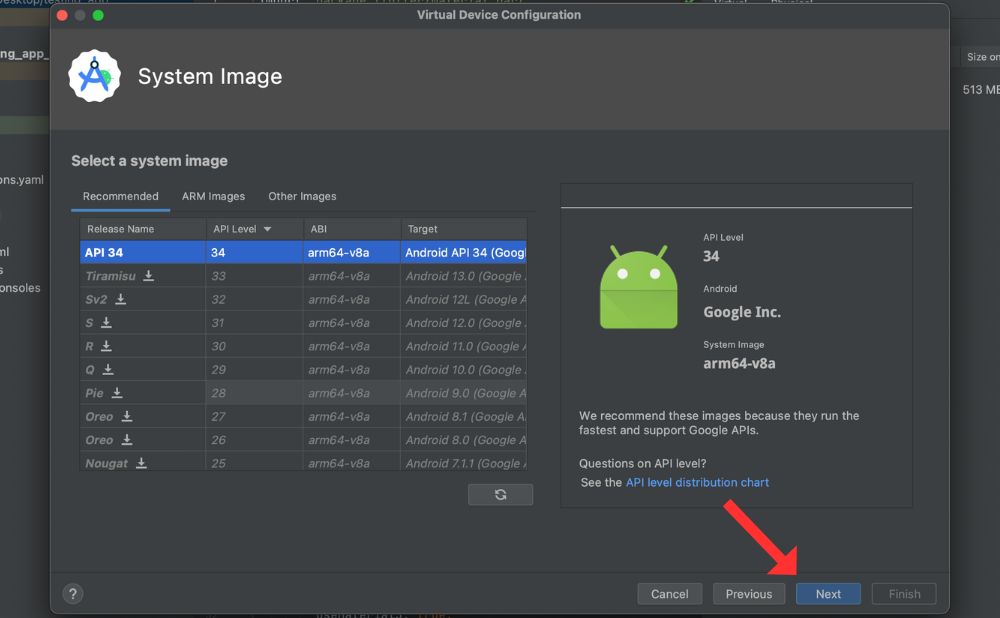
「System Image」で「Next」を選択。
「Next」ボタンが非活性の場合はデバイスに必要なものをダウンロードします。
「Android Virtual Device」で「Finish」を選択します。
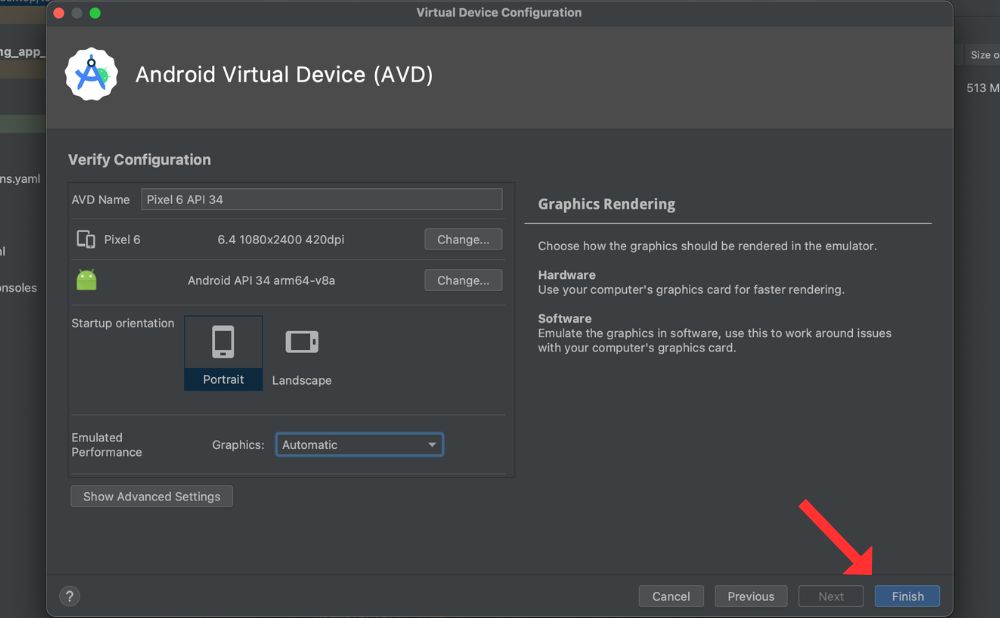
これでAndroidエミュレーターが作成されました。
続けてAndroidエミュレーターを起動させる方法を紹介していきます。
Androidエミュレーターを起動させる
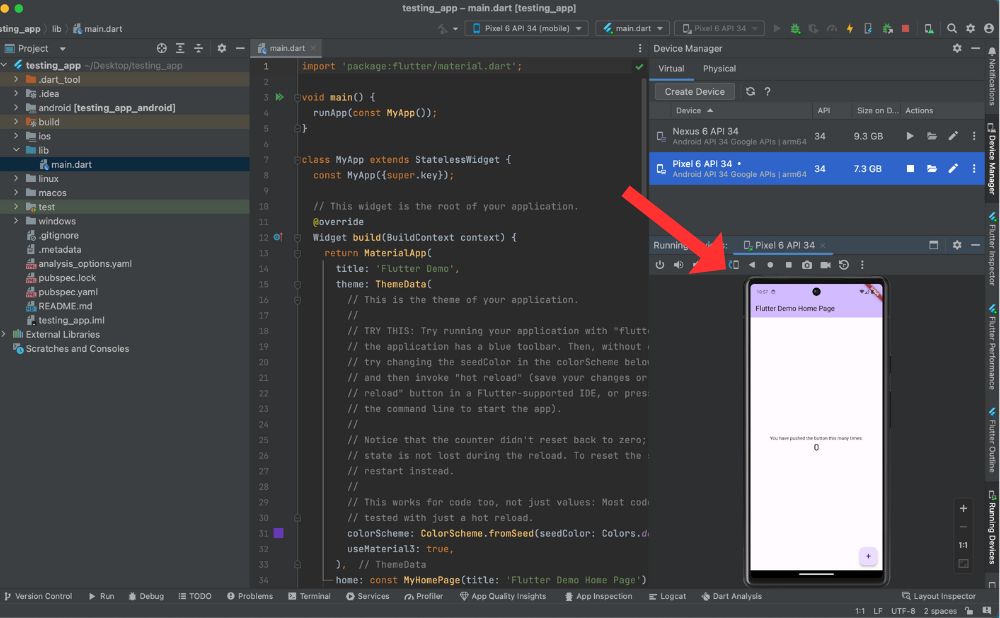
「Device Manger」を選択するとAndroid Studioで起動できるAndroidエミュレーターが表示されているので、好きなものを選択し実行をクリック。
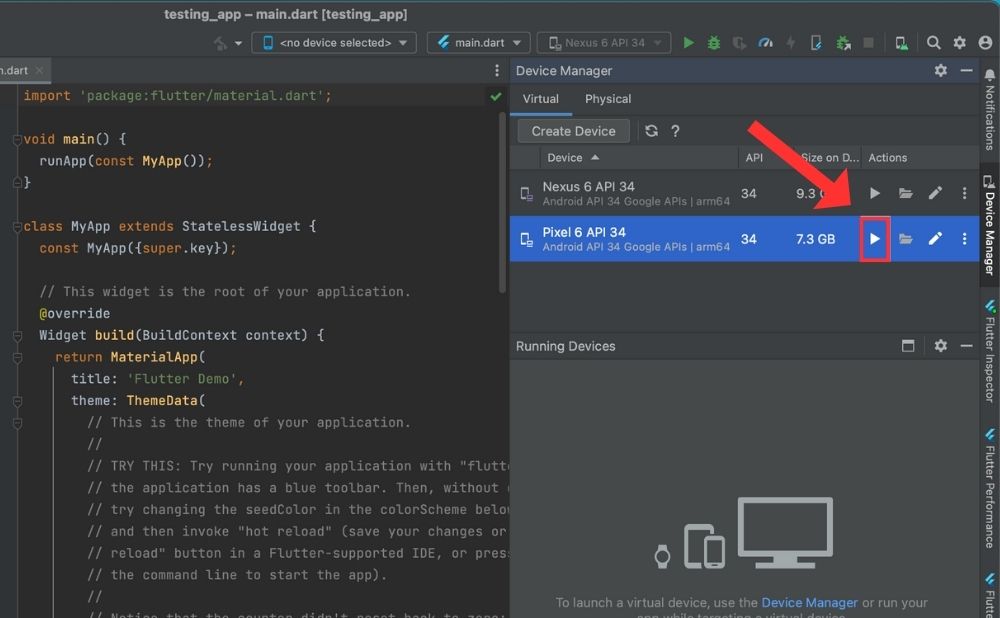
しばらくすると選択したAndroidエミュレーターが起動されます。
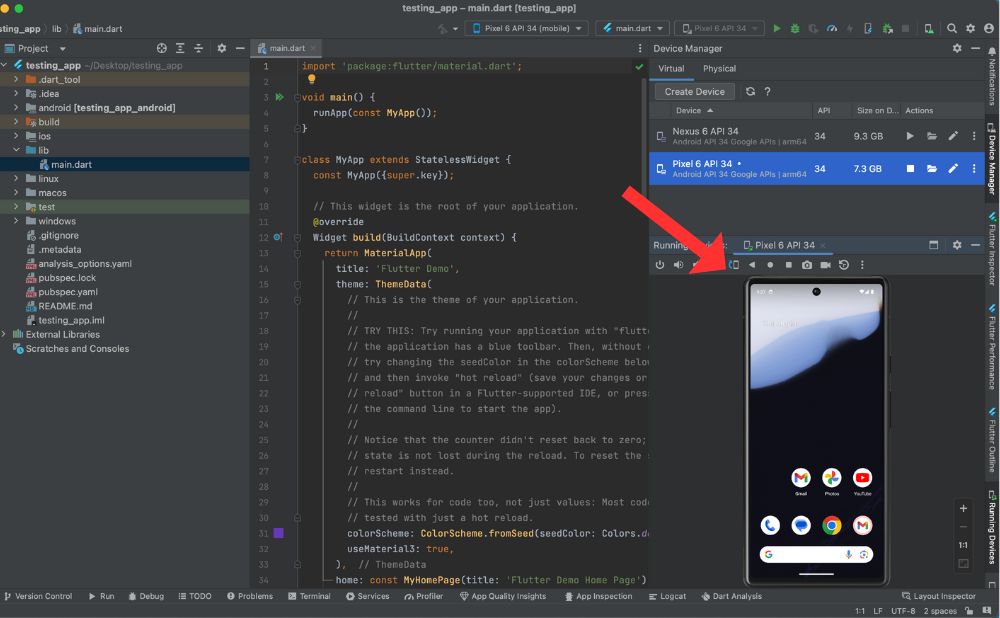
FlutterアプリをAndroidエミュレーターで起動させる
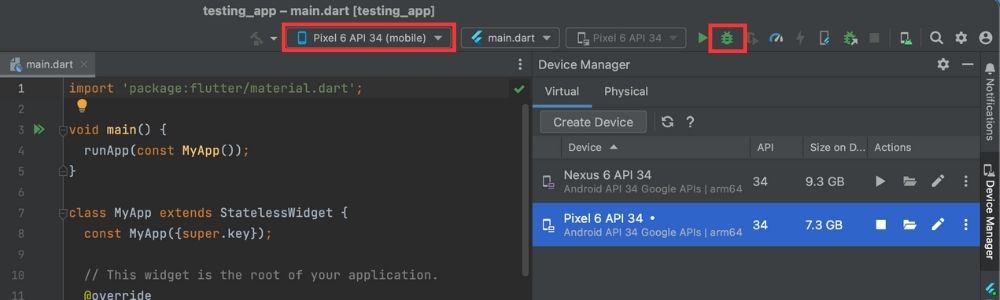
FlutterアプリをAndroidエミュレーターで起動させるには予めAndroidエミュレーターを起動させ、画面中央上にある「Flutter Device Selection」から起動させたAndroidエミュレーターを選択します。
次にデバッグボタンをクリックすればFlutterアプリがAndroidエミュレーターで実行されます。
この手順でAndroidエミュレーターでFlutterアプリを起動できます。