

こんにちは、フラメルです。
今回はColumn、Row、Flexで任意の子要素を主軸の余白いっぱいに広げられるExpandedの使い方を紹介します。
目次
Expandedの使い方
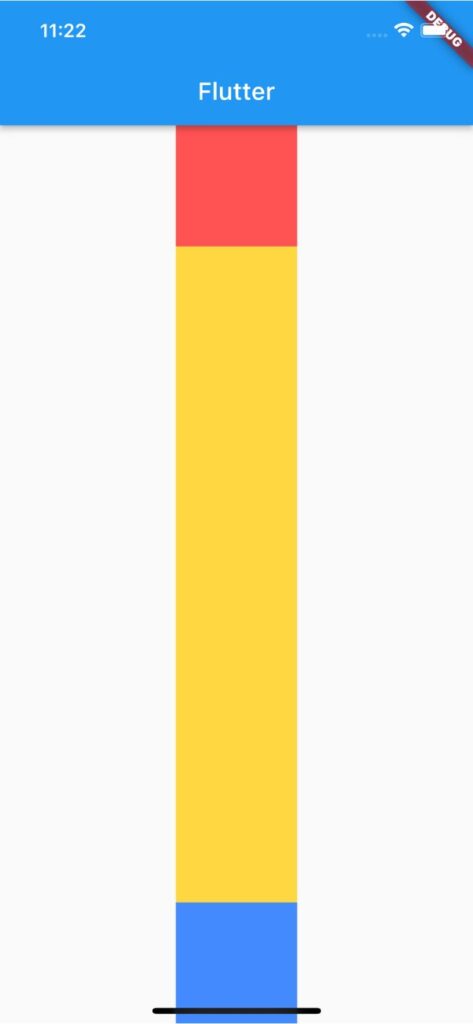
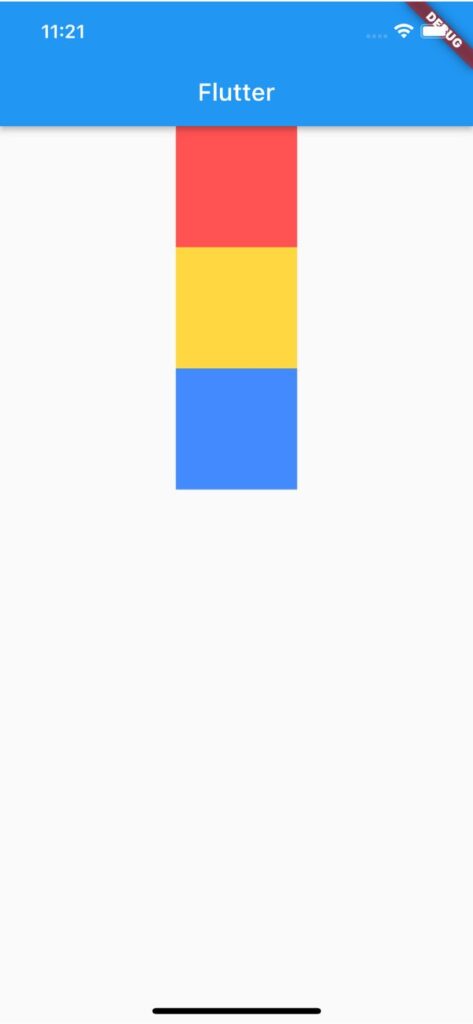
Column、Row、Flexの子要素をExpandedでラップすると主軸の余白いっぱいにウィジェットが広がります。
下記コードでは2つ目の黄色のContainerをExpandedでラップしています。
Column(
  children: [
    Container(
      width: 100,
      height: 100,
      color: Colors.redAccent,
    ),
    Expanded(
      child: Container(
        width: 100,
        color: Colors.amberAccent,
      ),
    ),
    Container(
      width: 100,
      height: 100,
      color: Colors.blueAccent,
    ),
  ],
),
Expandedを複数使用する場合
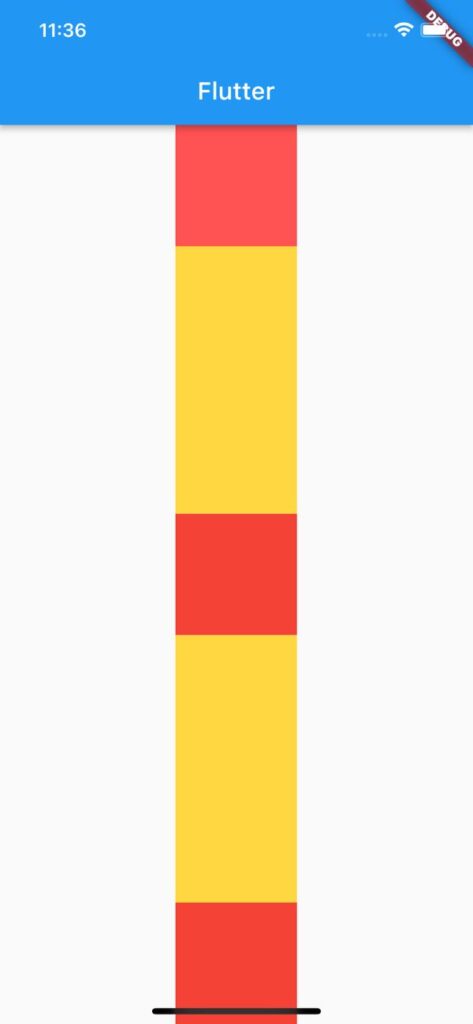
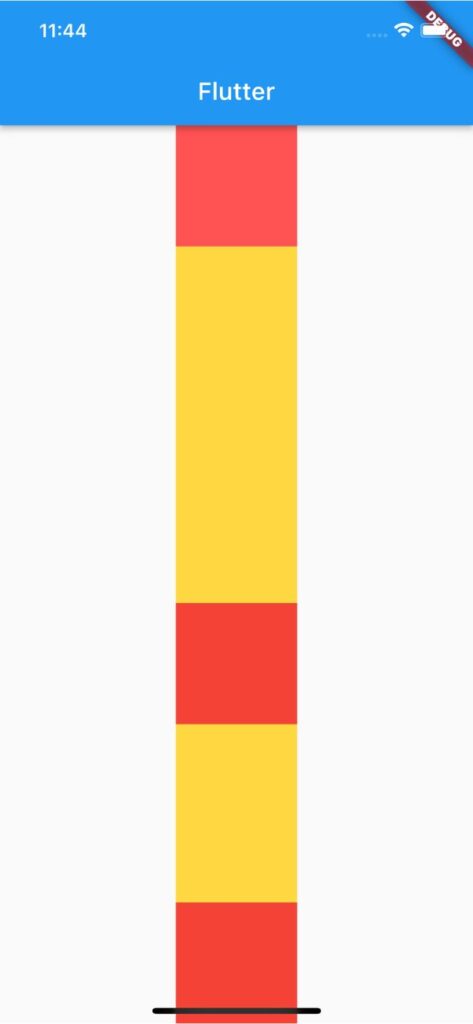
デフォルトで複数のExpandedを使用する場合子要素は主軸の余白を等分したサイズに調整されます。
よって、要素別にサイズを変更したい場合はflexを使用してサイズの比率を指定します。右画像では「flex: 2」と「flex: 1」の割合にサイズを指定しています。
Column(
  children: [
    Container(
      width: 100,
      height: 100,
      color: Colors.redAccent,
    ),
    Expanded(
      flex: 2,
      child: Container(
        width: 100,
        color: Colors.amberAccent,
      ),
    ),
    Container(
      width: 100,
      height: 100,
      color: Colors.red,
    ),
    Expanded(
      flex: 1,
      child: Container(
        width: 100,
        color: Colors.amberAccent,
      ),
    ),
    Container(
      width: 100,
      height: 100,
      color: Colors.red,
    ),
  ],
),
サンプルコード
import 'package:flutter/material.dart';

void main() => runApp(MyApp());

class MyApp extends StatelessWidget {
  const MyApp({super.key});

  @override
  Widget build(BuildContext context) {
    return MaterialApp(
      home: Scaffold(
        appBar: AppBar(title: Text('Flutter')),
        body: Center(
          child: Column(
            children: [
              Container(
                width: 100,
                height: 100,
                color: Colors.redAccent,
              ),
              Expanded(
                flex: 2,
                child: Container(
                  width: 100,
                  color: Colors.amberAccent,
                ),
              ),
              Container(
                width: 100,
                height: 100,
                color: Colors.red,
              ),
              Expanded(
                flex: 1,
                child: Container(
                  width: 100,
                  color: Colors.amberAccent,
                ),
              ),
              Container(
                width: 100,
                height: 100,
                color: Colors.red,
              ),
            ],
          ),
        ),
      ),
    );
  }
}
以上です。
合わせて読みたい
あわせて読みたい


【Flutter】Padding|余白を外側に作る
こんにちは、フラメルです。 今回はPaddingを使用して余白を作る方法を紹介します。 余白を外側に作る方法 Paddingあり Paddingなし ウィジェットの外側に余白を作るに…
あわせて読みたい

【Flutter】EdgeInsets|上下左右の余白を調整
こんにちは、フラメルです。 今回はPaddingなど余白調整をする際に使用されるEdgeInsetsの使い方について紹介します。 EdgeInsets.all|全サイドに同幅の余白を作る Edg…